Pages

Showing posts with label Dessert. Show all posts

Tuesday, December 18

Cocoa Lavender Cookies


The weather has finally turned chilly.  Next to the warmth of a lovely heater, wrapped in a little down blanket, I have finally found a moment to share one of my favorite recipes with you.  Cookies have always been a sweet part of my childhood winters. I became the baker of my family as a young girl. So when a fire was lit and blankets brought out it was quite routine for me to whip up a batch for us to enjoy.  Here in our cozy apartment a fireplace is not present, but I still feel the desire to continue the wintery tradition of cookie baking. My Love doesn't seem to mind....

Based off of my Chocolate Chunk Cookie, I created a delicious and aromatic lavender treat.  The Cocoa Lavender Cookie. Yum. Two of my favorite ingredients, lavender and chocolate, combine to create a wonderfully satisfying and perfect fireside cookie.  So grab a soft thick blanket, start a fire and get these cookies in the oven for a cozy and sweet wintery night. From my warm kitchen to yours, cheers!


{Cocoa Lavender Cookies}

2 3/4 cups of Almond Meal or Flour ( sometimes I do half and half for a sturdier cookie )
1/2 tsp Sea Salt
1/2 tsp Baking Soda
1 1/2 tsp Dried Lavender Petals, chopped
1/2 cup Pure Cocoa Powder
1/2 cup Grapeseed Oil
1/2 cup Agave
1 1/2 tbsp Vanilla
3/4 - 1 cup of Dark or Semi Sweet Chocolate, chopped chunky


Preheat the oven to 350 degrees. Whisk the dry ingredients together and then add the wet.  Gently fold in the chocolate chunks. Scoop dough with a tablespoon. Roll into a little ball in your palm and then slightly flatten on your cookie sheet. Provide an inch or so of space for the cookies to expand. Bake for 6-8minutes, depending on your oven.  Keep a close eye and remove them when they seem firm.  Allow cookies to cool for a good 15 min, then remove with a spatula.  Pair with a little glass of almond milk, wrap yourself up with that cozy blanket and savor each decadent bite!


Sunday, August 12

{Famous Chocolate Chunk Cookies}


The chocolate chip cookie, so simple and yet so strangely essential.  Since discovering my new direction with food, many attempts have been made to perfect this little treat.  Each one has been an adventure, bringing me closer to understanding the workings and secrets of baking a perfect gluten-free and vegan chocolate chip cookie.

I'm an admirer and follower of Elana Amsterdam, the author of two cookbooks and a lovely blog called Elana's Pantry.  A strong advocate of almond flour, she has convinced me of it's benefits.  Her use of it in her chocolate chip cookies intrigued me.  I gave her recipe a try, loved it, but decided to add my own twist to it.  Not too long after, I found my own perfect chocolate chip cookie.  It turned out to be truly delicious and nutritious!

Now, I can't say I have created the chocolate chip cookie, because we all know this world is full of varying preferences, but I can say just about everyone who has tried my cookies asks for more or for the recipe.


This post is the belated fulfillment of many promises over the months to share this recipe with you all. It's been my little secret for the last year or so, but now I'm excited to finally bring it to your kitchen!

{Chocolate Chunk Cookies}

2 3/4 cup of Almond Meal
1/2 tsp Sea Salt
1/2 tsp Baking Soda
1 tsp Cinnamon

1/2 cup Grapeseed Oil
1/2 cup Agave or Pure Maple Syrup
1 tbsp Vanilla

1 cup roughly chopped 65-70% Dark Chocolate
1/2 cup Semi-Sweet Dairy-Free Chocolate Chips

Preheat the oven to 350 degrees. While it's heating whisk the dry ingredients. Add the wet ingredients in the order given and mix with a wooden spoon until thick.  Fold in the chocolate chunks and chips.  Use a tablespoon to plop the dough on a cookie sheet, about an inch apart.  I recommend using a pastry mat with your cookie sheet, but if that's not available lightly grease the sheet.  Gently press the dough with the heel of your hand to keep the tops from browning too quickly. Bake for 6-8 minutes or until golden brown. Let the cookies cool for 15 minutes and then remove using a spatula.  

As you try this lovely recipe feel free to ask questions.  I know it can be difficult, following a recipe to a tee, especially if you have variables like crazy ovens, so ask away! Enjoy!

{Shared With}


Monday, July 9

{Strawberries and Cream}


Sometimes I just love the sweet simplicity of fruit.  This month ripe Strawberries have my attention. With their pure, divine flavor, they are simply a fruit like no other.  We have many local strawberry fields here in Carlsbad, so I'm a bit spoiled.  At the farmers' market it's common to see boxes and boxes of organic ruby-red Strawberries, plump with juice and goodness.  So, it's no surprise that they are a summer constant in my fridge!

 I love to try new food combinations and pairings whenever I get the chance and just the other day I brought home a new delicious Goat Chevre from Trader Joe's.  I quickly decided it needed to be tried with the Strawberries.  The result: mouth-watering perfection.  This little combo has proved to be a perfect treat and easy dessert for any summer party!

{Strawberries and Cream}

Bowl of fresh ripe organic Strawberries
Honey Goat Chevre (Trader Joe's)
Gluten-Free Rice Crackers (Trader Joe's)

I've tried this numerous times now and actually have two ways of enjoying this treat!
One: Wash and cut the tops of your Strawberries and dip straight into a little bowl of Honey Chevre.
Two: Spread the Honey Chevre on Gluten-Free Rice Crackers, then thinly slice your Strawberries and arrange on them each Cracker.  Voila!

Enjoy!

Thursday, March 29

{Gluten-Free & Vegan Brownies}


It's been a busy week, full of training for a new journey.  It started last November when I fell in love with a fabulous workout that combined the grace of ballet and the balance and strength of pilates. Called Xtend Barre, it leaves me feeling beautiful, elegant and strong, feelings every woman should have after an hour of hard work! It took a little coaxing, but I decided to learn how to teach Xtend.  Two weekends ago I spent three days trying to soak up all the choreography, technique and body awareness necessary to teach it well.  Now, I'm training just about every day to improve and prepare to teach.  It's been exciting and fresh, yet exhausting! My body is quite ready for bed each night and rather cranky about rolling out in the morning, but I'm determined to keep on.  

For some odd reason chocolate tends to become more enticing when my body is worn out.  Last night I felt a sudden desire to bake brownies. This is a treat that has many happy childhood memories attached to it, only back then it included Ghirardelli's double chocolate brownie mix.  Nowadays it's a bit tougher to find a reliable gluten-free and vegan brownie recipe that satisfies my gooey chocolate appetite.  

My most recent attempt actually turned out quite well! So well, I thought it worthy of sharing with you.  It follows the general outline of BabyCakes' recipe, but as usual I substituted and added for a better result.  My changes made it mostly sugar-free too! I hope you give it a try when you're hearing the chocolate call.  

{GF & Vegan Brownies} 

1 Cup Chickpea Flour
1/4 Cup Potato Starch
2 Tbsp Arrowroot
1/2 Cup Unsweetened Cocoa powder
2 tsp Baking Powder
1/4 tsp Baking Soda
1/4 tsp Xanthan Gum
1 tsp Sea Salt
1 tsp Cinnamon

1/2 Cup Pure Maple Syrup
1/4 Cup Xylitol
1/2 Cup Grapeseed Oil
2 Tbsp Vanilla Extract
1/2 Cup Hot Water

1/2 Cup Vegan Chocolate Chips 
1/2 Cup Chopped Semi-Sweet Chocolate Chunks (from a block of Chocolate)

Whisk all the dry ingredients in a large bowl.  Add the wet and mix slowly.  Fold in the Chocolate and pour into a greased 9 x 9" baking pan.  Bake at 325 degrees for about 10-15 minutes. The 15 minute bake time gives you a slightly firm crust and moist middle. If you like your brownies more on the gooey side pull them out sooner, closer to the 10 minute bake time.  Pair with some yummy coconut ice cream and fresh fruit for a delicious evening dessert. Enjoy! 


{Shared}

Thursday, January 19

{2Good2B Bakery & Cafe}

Delicious food for all? For those of us in the gluten-free community options are growing, but for those with more than just gluten-free needs it's difficult to find food that is (what I like to call) everything-free.  How often have you wished for a bakery, deli or even coffee shop where you could completely relax, perhaps even eat and drink everything on the menu? Not possible, right?  Well, I am excited to announce that such a place has emerged.

2Good2B is the name and everything-free food is the game. Located in the heart of San Diego's own seaside town of Encinitas, 2Good2B is an appropriate name for the quality and variety provided by this lovely cafe and bakery.  All items listed on their menu are gluten-free, soy-free, corn-free, peanut-free and occasionally dairy-free and egg-free.  Started by self proclaimed foodies Mike Barbanti and Diana Mourato Benedek, this place brings deliciousness to another level.  Their standard is not limited to the gluten-free or allergy-friendly crowd, but to all.  Their breads and desserts rival and I would say even trump those filled with gluten, soy, corn and many other typical ingredients.  See their website for more about their personal health journeys and the creation of 2Good2B.

Options are wide and favorites have already been established.  With freshly baked choices like chocolate pecan cranberry oatmeal cookies and vanilla bean passion fruit muffins, how could anyone resist? Everything goes quickly, so early orders and pick-ups are recommended.  
I heard about 2Good2B last week and headed straight over! As my husband and I drove up I immediately noticed the beautiful "gluten-free" writing in the window and practically bounded out of the car with excitement.  Entering the cafe we were immediately engulfed by the mouth-watering aroma of freshly baked bread.  In cases near the door, rows and rows of beautiful cupcakes and brownies quickly drew my eye.  I glanced at the menu and my excitement heightened.  Quiches, pizzas, sandwiches, paninis, and salads?  All GF? Really? Then I saw it, the origin of the lovely smell: a case full of fresh breads and gorgeous baguettes.  As I stood staring at the case, a kind voice greeted me and asked if I needed anything.  I introduced myself and met the assistant manager, Jack, who turned out to be one of the most gracious individuals I have ever met.  He sent us home with many tasty treats to photograph and try.  His passion for helping others find safe food is obvious.  The atmosphere he provided clearly stemmed from the heart of 2Good2B's creators, Mike and Diana.


2Good2B focuses on high quality foods, drinks and desserts, using many local and organic ingredients.  You can enjoy a tasty, moist muffin with a steaming loose leaf tea with the knowledge that you're eating well while sustaining your local community! When picking their vendor for coffee and tea 2Good2B chose Virtuoso: a local, certified organic company that carries products known for being easier on the stomach.  Once again, a clear sign that Mike and Diana have thought carefully about every detail, creating the perfect environment for people with sensitive stomachs!

Our lunch that afternoon consisted of many personal recommendations from Jack.  We decided on a delicious panini with the artisan rosemary bread made fresh that morning (which he paired perfectly with vegetable chips) and two refreshing and invigorating drinks, the Moroccan Mint tea with honey over ice and the spicy Virtuoso Chai tea.  We followed the panini with Mike's famous baguette and lemon cupcake.  My favorites were the baguette and rosemary bread.  I felt transported to Paris with each moist and buttery slice.  Heaven on earth.  Needless to say, we savored each bite and devoured every last morsel!


My only hesitation with the breads lies in the teff and millet flours.  I have a sensitivity to these flours.  Even though I can't eat too much, the flavor of the breads is still amazing.  If I may, I would like to put in a request.  I would love to try artisan breads from Mike that incorporate other gluten-free flours. He may even be up for creating the treat I miss the most: the croissant!  He is quite an artist in the kitchen, so perhaps such options will come in the near future!

There are so many varieties and specialties available that I could expand on!  You will just have to discover them for yourself! The menu alone should get you out of your seat, but honestly the atmosphere was what made the entire experience golden.  I hope you all jaunt over to 2Good2B as soon as you can.  It's everything you dreamed it would be.
Enjoy!

{Heads Up}
The bakery and cafe will be undergoing a renovation from Jan 22nd to February 4th.  Menu options will be increasing to include such delights as pot pies, soups, mac and cheese dishes, meatball subs, calzones, cinnamon rolls and cinnamon breads.  Make sure to stop by before they close and then head over after Feb 4th for all the new treats! I'll be there! 

{All photos taken and provided by Sweet and Salty Life}

Saturday, December 10

{Pumpkin Oat Breakfast Squares}


It's December! Can you believe how quickly it has come? I love this season.  It's full of everything cozy.  Recently I've had the urge to bake with pumpkin...courtesy of a wonderful Thanksgiving. The treat I'm sharing with you was a complete experiment and turned out quite tasty.  It just might satisfy your pumpkin lovin' too!

{Pumpkin Oat Breakfast Bars}

1 cup Pureed Pumpkin
2 Small Zucchinis (whirled in a food processor)
1/4 cup Agave + 1/4 cup Pure Maple Syrup
1/4 cup Unsweetened Applesauce
1 tsp. Vanilla Extract
1 tbsp Grapeseed Oil

1 cup GF Oats (Trader Joes)
1 cup Almond Meal/Flour (Trader Joes)
1 1/2 tsp Baking Soda
1 tsp Cinnamon
1/2 tsp Sea Salt

Process all the wet ingredients in a food processor or with a hand blender and place in large bowl.  In a separate bowl whisk the dry ingredients together.  Slowly add the dry to the wet until well blended.  Pour into a muffin tin or baking pan; it's a versatile batter.  Bake at 350 degrees for 35-40 minutes, depending on your oven and the baking pans you choose. Stay close and keep an eye on it.  Once it's a golden brown pull it out and let it cool.  Eat with a smear of butter or raw honey or even just as is! It reheats well, so feel free to store leftovers (if you have any...) in the refrigerator.  Tasty, tasty!

Enjoy!

Thursday, September 8

{October Love-Wedding Cake}


We are in the final count down! With less than a month to go, my Love and I are working on the fun details now.  Our little home is also coming together as bits and pieces are added.  I have been in a major nesting mood.  I'm just so eager to make our space a relaxing place that my Love can't wait to come home to every day.  

As the details emerge, one in particular has my attention and focus.  Unlike many brides, I cannot order a  standard wedding cake.  My guests, at least most of them, could eat it, but not me.  Fortunately, I have some things going for me.  First, I love simple small cakes 6-8" to be exact, second, I LOVE baking my own desserts and lastly, my Love LOVES to eat my desserts! How perfect is that! 

Soooo the great experiment and hunt has begun.  I have scoured my many...many...cookbooks and magazines, as well as my many past creations, in order to create a trial list of 6 cake varieties.  These include vanilla, chocolate, carrot and maple cakes with all sorts of coconut, buttercream, rich chocolate and vanilla frosting options. I'm in heaven!  The only slight negative is the amount of tasty batters and cakes I will continually have around me....  I will try to keep you all posted as I try and experiment with these fun recipes.  My plan is to bake mostly one or two layers just to try.  For the actual cake I would like to create a 3-layer 6 inch cake.  I love 6 inch cakes; they are the perfect little size!

Email me if you want recipes and I will direct you to the cook books I used so that you can give it a try too! Come bake with me!


My round 1 went very well.  It was picture worthy, as you can see.  I baked a rich chocolate cake with a sweet vanilla, butter cream frosting.  My Love enjoyed the flavor, found the texture a bit springy, but as we all know that is much better than dense (which was the result of round 2) and overall found it quite delicious.  I must admit the frosting paired well and I spread some blackberry preserve in the center, which really sealed the perfection. 

Rating: 7 out of the perfect 10

Tuesday, August 16

{GF & Vegan Blueberry Oat Bread}


As an update, I am allowed to follow my regular diet now and how sweet it is to be eating more "normal" again.  I will do my best to never complain about my delicious diet ever again! Since then I have had such fun creating recipes, whenever wedding planning and work permit.  I created this moist loaf a bit ago and forgot to share it with you, so here it is! Try the rescipe or use it as a guide and  experiement.  Let me know how yours turns out! Any other baking risk takers out there? It's a favorite past time of mine to take a few recipes I find and combine their ideas or even to just gather some favorite ingredients from my pantry, pile them onto my little kitchen table and start playing.  I'm not a rule follower, nor an "in the lines" type of artist... 

Here's the steps for my yummy treat.  I loved using Almond and Coconut Flour in this; they are both full of protein and fiber and produce a yummy moistness to the treat.

P.S.  I always get my Almond Meal/Flour from Trader Joes.It's less than half the cost anywhere else!


{GF & Vegan Blueberry Oat Bread}

1/2 C Almond Meal/Flour
1/2 C Brown Rice Flour
1/4 C Coconut Flour
1 tsp Baking Soda
1 tsp Cinnamon
1/2 tsp Sea Salt

1/4 C Grapeseed Oil
1/3 C Agave Syrup
1/3 C Unsweetend Vanilla Almond Milk
1/2 C Water or Almond Milk
1 tsp Vanilla
1/4 tsp Xanthum Gum

1 C GF Oats
1 tbsp Chia Seeds

Fresh or Frozen Organic Blueberries

Mix your dry and wet separately, then slowly pour the wet into the dry until well blended.  After this, gently mix in the Xanthum Gum.  Be careful not to overmix.  Xanthum Gum helps the batter rise, waht gluten usually does in baked goods.  The only downfall is that it can make your batter gummy, so avoid over stirring it.  Next fold in the Oats and Chia, then pour prepared batter into a greased loaf pan.  If you are using fresh blueberries you can fold them in with the Oats and Chia.  If you are using frozen berries, wait and carefully place them (with the help of a spoon) into the prepared batter in the loaf pan.  Otherwise the frozen berries will dye the loaf blue!  Bake at 350 degrees for 40-45 minutes or until a butter knife comes out clean from the center.  This tends to vary from oven to oven, I have found.   Let it cool and then slice and serve with a delicious buttery spread.
 Enjoy!


{For Other Yummy Treats}

Friday, August 5

{Local and Seasonal}


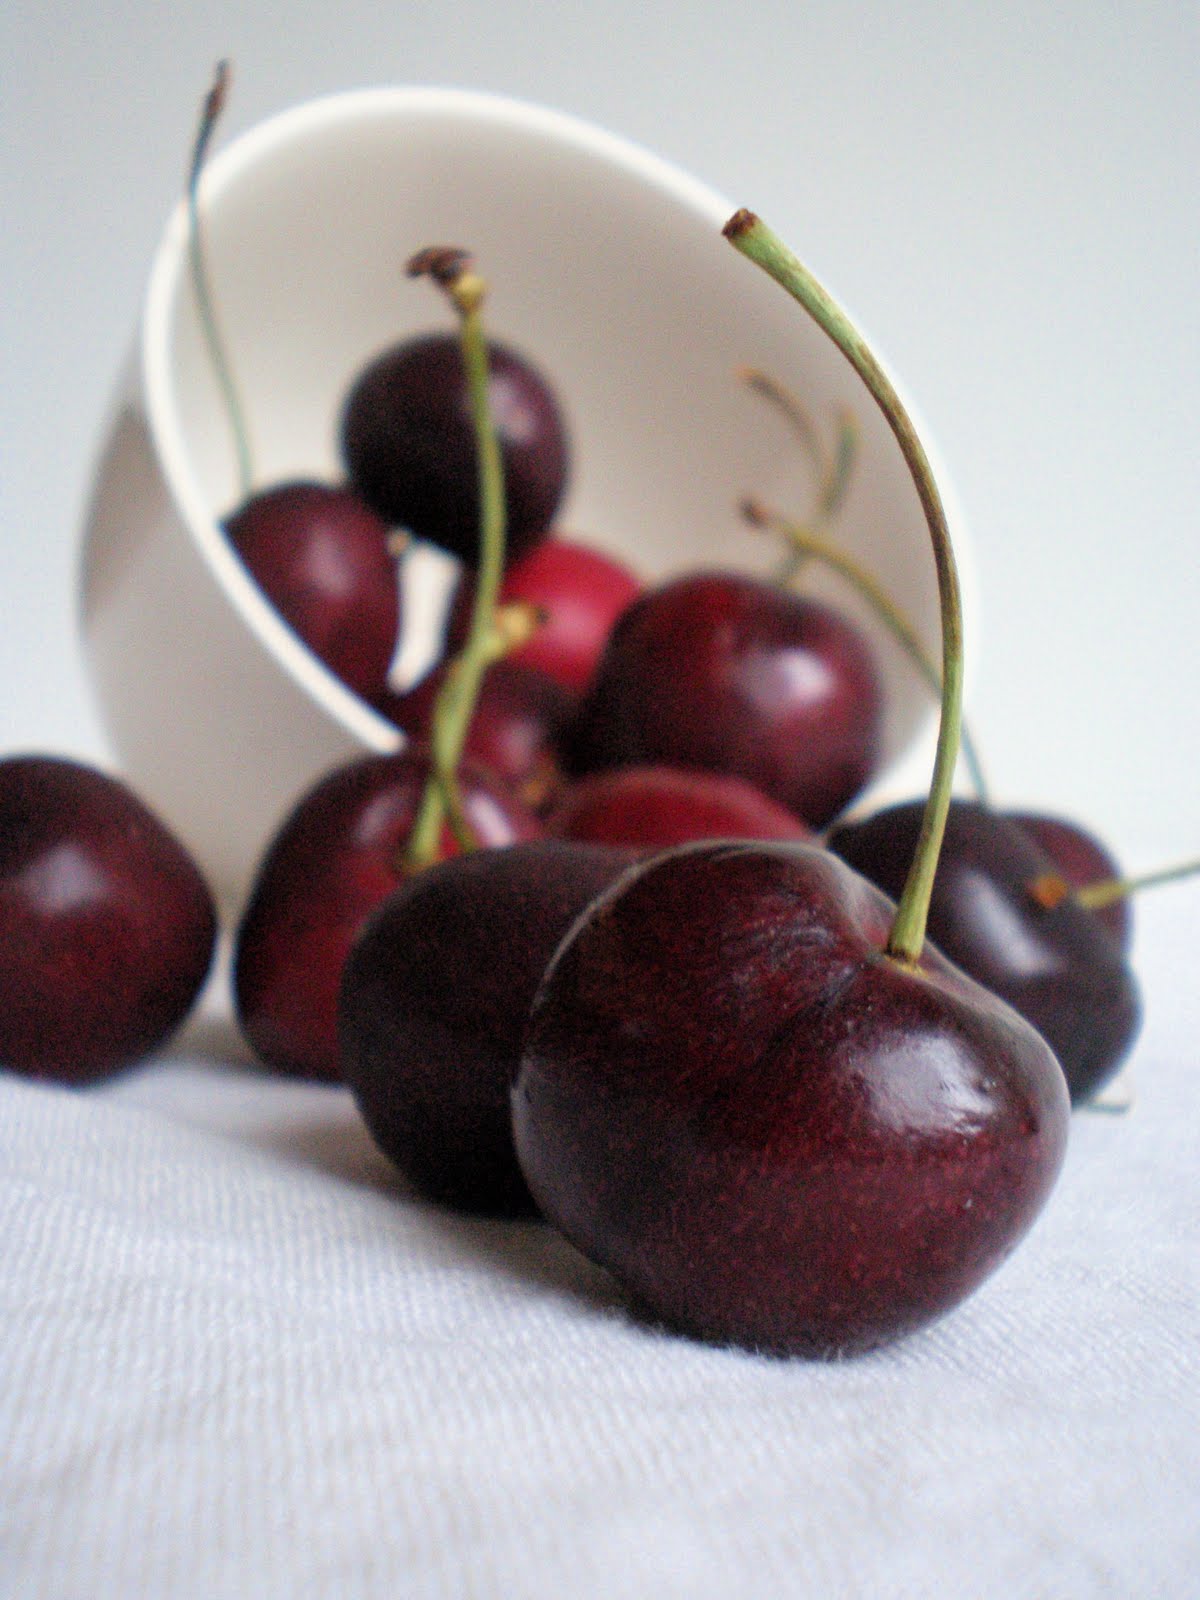
 A rich color of burgundy caught my eye right as I entered the market. Shiny and perfectly plump, I couldn’t help but sample one.  A sweet flavor filled my mouth and warm summer memories flooded my thoughts.  Yes, it’s really that wonderful time again, cherry season!

Many of you may have noticed a new "trend", signs for local and seasonal foods.  Well, it’s more than a trend, it’s a very healthy approach to life.  Here’s a bit about this wonderful movement:

Why eat seasonal? Well, a simple answer could be, it’s cost effective! It also means the produce will be ripe and at its sweetest and most flavorful point.  How do I know what is in season? A wise woman once told me, the best way to tell what produce is at its peak season is by seeing what’s on sale at your local market.  Farmers and markets typically have more than they know what to do with, so the produce is sold for fabulous bargains and you can eat it right away, enjoying the rich flavors!  A pretty nice little situation if you ask me. 


Why eat local? I believe in supporting the individuals that work hard to produce whole, nutritious and fresh foods.  It has become a lost art as norm of our culture is mass production.  The men and women that fight against the grain to provide quality food for their community should be supported and encouraged.  Thankfully, many markets have picked up on the grassroots movement towards local and seasonal foods.  Whether it’s supply and demand or profit-based, I am grateful for the turn our culture is taking.  We need to reevaluate what we are putting into our bodies and remember the age-old saying, “you are what you eat”.

So head on down to our local farmers market or health food store to find other delicious seasonal produce! Enjoy!

Monday, May 30

{The Everyday - Snacks}


Welcome to my new {The Everyday} posts! I've decided to take the time to share some of the foods I eat on a more regular basis.  I a finding that many of you have questions about the day to day diet.  Questions like, what do I eat for snacks or breakfast or how do I eat enough protein from a Vegan, Raw and GF menu?  I have my staples and the occasional new treats I find and try, so I thought I would begin to share these with you all.  There are so many options out there.  Let's explore them together!

This week I gave a new brand of tasty-looking granola a try.  I've been bored with my breakfast and wanted to spice it up with something! Typically GF granola is loaded with flaxseed, which I'm not  huge fan of, but this granola had all the ingredients I like to use instead! I was so excited! They had a few flavors and though tempted to try all of them, as is my nature, I limited myself to two.  I'm not going to lie, the price for these little goody bags was not easy to swallow, but such is the game with Raw,Vegan and GF food.  The Cherry Ginger and Cranberry Orange were the flavors that made the final cut and came home with me that day.   Needless to say I did not have the patience to wait until morning to give each a  try.  I popped the bags open on the way home and took a nibble a bit of each.  Wow.  I was even more excited.  Each kind had a perfect blend of spice, nutty oatiness and that tart, yet still sweet, dried fruit! I loved both flavors!

When I got home I sat and read a bit about the company.  A wonderful part about the Vegan, GF and Raw community is the stories behind the process of the food.  Real people, small operations and a passion for the health of others.  Typically you can find out about it all on the packaging, but their websites are always fun to visit as well.  Laughing Giraffe Organics is one such company.  They are the creative geniuses behind these new finds.  A family run business, this company makes all of their products by hand. It's aspects like this that make me ok with paying a greater amount for my food.  Quality over quantity, so the opposite of the rest of our commercialized and processed food.  You get what you pay for!  I also love their vision.  They say it well. Yay for pure and whole nutritious food! 


"Laughing Giraffe Organics provides healthy snack foods that are made from the finest organic ingredients. Because our products are made from real unprocessed foods, they are extremely rich in nutritional value. Small amounts will satisfy your snack needs more than “empty calorie” snack foods. Real foods have real calories that are needed to stay healthy and they taste great!"


Saturday, April 30

{A Sweet Mistake}


Group-on coupons started it all.  A dear friend who knows of my cooking obsession signed my mom, my Love and me up for a cooking class with the wonderful Freddi Parker.  I fell in love with her immediately.  She is a marvelous and creative chef that loves the people she is around just as much as the food she makes for them.  I just received the opportunity to help her prepare food for a few of her classes in June.  I cannot wait!

It was one of her desserts from that class that inspired me.  She creates a fabulous three ingredient, flourless and decadent chocolate cake.  Unfortunately two of the ingredients are eggs and butter, which as we know is not welcomed by my tummy.  I quickly knew I had to attempt to recreate it without these two of the three.  The challenge was on.  I gave it two solid tries in one night and well, it was quite a failure.  Most well trained Chefs would laugh at my notion to even try as eggs are quite difficult to replace in such a recipe.  I can only explain the attempts by my simple desire to create the impossible.  Perhaps someday I will....

So, sadly I do not have a recipe for you today.  You're probably wondering why are you blogging then Silly? Well, the reason I'm sharing this with you is because I want you to know that I fail.  For some reason, you all seem to think I only experience success.  Well I must correct this myth, because honestly, I fail all the time.  Just ask my family, my close friends and most of all my sweet Love.  He, brave man, will even venture to taste test my failures.  His response to the food, my distraught look and sad kitchen moans typically goes something like this..."well, I'm sure it would be great with some ice cream?" To which I either laugh or at times hold back tears.  These are difficult mistakes to swallow, expensive {everything-free} food is not the easiest to throw away.

Cooking is an art, but it is also a science.  A calculated experiment that can really go wrong.  Yet, do not be discouraged.  There is always room for a good solid rescue.  As my man would say, add ice cream or restructure the result and create something entirely new! This second option is exactly what I did with my failed flourless cake.  I scooped it out of the cake pan and pressed it into little cookies.  I froze them, added some leftover, vegan frosting and created little chocolate, cookie sandwiches.  They were DIVINE.  As a past girlscout  cookie lover, these tasted just like my favorite thin mint cookies! I could not believe it.  This kitchen adventure left me with a different, delicious chocolatey goodness and a renewed hope to continue my chemistry experiments.


Take this as a little cheers, do not give up my dear friends, enjoy the learning process and never stop experimenting in the kitchen.

Bon Appetit!

Thursday, March 24

{Golden Honey Coconut Carrot Cake}


Happy Thursday dear friends! Despite the forecast of rain on my birthday, Jesus brought me sunshine! A beautiful, vibrant blue sky greeted me Wednesday morning and I couldn't have been more surprised.  What a perfect and lovely birthday present to welcome in my golden birthday.

I love to bake.  Rarely ever pass up an opportunity to bake a cake, I just had to bake my favorite for my special day.  I truly dislike creating cakes without a reason, even though I could use the practice.  I like to have friends and family to savor my victory or eat the failure.  Cake needs company.  I chose one of  my favorites, a delicious Carrot Cake, and whipped up a heavenly Coconut Honey Frosting to complete this scrumptious dessert.  I just finished off a slice tonight and oh dear is it good.  Nothing like the moist and almost chewy texture of a good carrot cake on your birthday or the day after!


I used a delightful recipe that came out quite nicely in my new spring-form cake pans (thank you mom!).  The cake and frosting recipes came from other baking geniuses, but I added a few twists of my own to both and loved the results!  I'm starting to get the hang of frosting.  It's had me in tears multiple times, so I was pleasantly surprised when  it developed smoothly and tasted divine!  A pet peeve I have with frosting has made the process more difficult than it normally should be.  I just can't help this one.

I hate powdered sugar and shortening in frosting.  It gives me a major sugar rush (the bad kind) and a headache within minutes of eating.

If you are familiar with frosting ingredients, this eliminates just about every good thick, creamy frosting recipe known to man kind, well practically.  Fortunately, I found one that uses agave/honey and coconut oil.  Most I've tried melt after being pulled out of the fridge and create a gooey, oily frosting that looks and tastes terrible.  Not this one, it's actually thick and frosts nicely!

Thanks for celebrate a bit with me! I hope you enjoyed the yummy photos of my golden birthday cake!


{Linked to}

Sunday, January 16

Vegan Raw Samoa Cookies

January, a month of beginnings and new resolutions.  By now many have already given up on those dreams and goals, allowing themselves to sink back into the well-worn trail of 2010.  It's easy to concoct beautiful visions of new and refreshing habits and lifestyles, but difficult to stay true to them as time passes.  Our daily life swirls around us, slowly wiping away the conviction, motivation and memory we had only weeks before.
Last January I took on a little dream of my own, which over time has built up this lovely Sweet and Salty Life of mine.  Creating this blog was the result of a few nudges, a bit of foodie-film inspiration and a deep desire to write about my culinary creations and experiences.  A year later, I am still here and loving every time I get to share a bit of my story. 
As a part of acknowledging my journey I just want to thank each and everyone of you that have encouraged me, sampled my tasty and perhaps not so tasty experiments, taken the time to read my thoughts, given feedback and most of all shown such a desire to love what has become my passion.  

So cheers to another year of culinary adventure and to all of you my dear friends!


To continue the adventure I bring you a girlscout-inspired treat, the Samoa Cookie! A delicious concoction, this recipe was a pleasant surprise thanks to my delightful, new food processor.  By far my favorite gift from my parents, I have had such fun playing with nuts, fruit, flour, etc. in my beautiful Cuisenart.  The cookie for today is completely Vegan with frosting that is both Vegan and Raw.  Could it be any better for you? 


{Vegan Samoa Cookie}

Ingredients:

Base
1/4 cup Raw Cashews
1/4 cup Raw Almonds
1 TBSP Raw Chia Seeds
1 cup Gluten-Free Oats
1 tsp Macca Powder
2 TBSP Raw Coconut Nectar (raw agave or honey might work as well...just haven't tried it yet!)
1 TBSP Raw Maple Syrup (again....your choice)

Frosting
3 TBSP Raw Coconut Oil
1-2 TBSP Raw Agave Nectar
2 1/1 tsp Raw Cocoa Powder
Dash of Cinnamon
Dash of Pink Sea Salt

Begin by processing the Nuts, Seeds and Oats together.  Add the Macca quickly after and continue to process.  Drizzle in the Coconut Nectar and Maple Syrup and pulse. Use a rubber spatula to scrape the sides and pulse again until the Nuts, Seeds and Oats stick together.  Scoop out and place in a pan lined with parchment paper.  Spread the base pressing it outward  with clean hands until the surface is even and it's about 1/4-1/2 inch thick.  Place the pan in the refrigerator for 30-45 minutes. 

While it's hardening, combine all the frosting ingredients in the processor and process until smooth and lightly warm.  Pull out the base and frost your cookie! Return the pan to the refrigerator (for longer preservation put in freezer) until frosting is hardened.  When ready, cut into bars and enjoy! They soften the longer they are out of the fridge or freezer, but you'll eat each so quick you probably won't even notice!

Good luck with your 2011 dreams, may they be just as sweet as this simply delicious treat.


{Linked to}

Tuesday, December 14

Vegan Carrot Cake


Carrot cake is one of my favorite desserts, so need I say more?  Creating the perfect recipe has been a dream of mine.  I’m nowhere cocky enough to say that this recipe is the best recipe you will ever find, but I am rather proud of the result! It’s a tasty, healthy and allergy-friendly version of grandma’s decadent carrot cake.  You will want a second slice and you'll still feel great after having it!

When it came to frosting this cake, I was determined to find that perfect vanilla frosting.  I have a difficult time so far because I want to create a recipe without sugar and butter.  I was fortunate to find a great candidate at Elana’s Pantry.  Elana has fabulous, allergy-friendly recipes that will inspire you, so maybe head over there after you give this recipe a try!  She has a great frosting recipe that I used for this carrot cake and it really turned out well.  My only complaint (if you can really even call it that) is its need for refrigeration, but that's just the nature of the ingredients I suppose! 

So dear friends, here it is.  This lovely carrot cake is my own little creation, full of my favorite, safe spices and unique twists!
Enjoy!


{Vegan Gluten-Free Carrot Cake}

Ingredients:
~ 1 two-layered cake

1 cup Brown Rice Flour
1 cup Chickapea/Garbanzo Bean Flour
½ cup Sorghum Flour
½ cup Coconut Flour
1 TBSP Ground Ginger
1 tsp Ground Cloves
2 tsp Cinnamon
1 ½ tsp Baking Soda
1 tsp Xanthan Gum
¾ tsp Sea Salt

1/3 cup + 1 TBSP Ground Chia Seed
(I would recommend 1/4-1/3 cup for a fluffier cake, reduce water to ¾ cup if you do so)
1 ½ cup Warm Water

1 TBSP Vanilla Extract
1 cup Grapeseed Oil
1 cup Light Coconut Milk
1 cup Agave
1 cup Sucant

1 ¾ cup Grated Carrots (about 4 medium carrots)
1 cup Raisins

To begin, preheat oven to 350 degrees and grease two 9inch cake pans, layering the bottoms with parchment paper.  Mix all the dry ingredients listed first, in a medium bowl.  In a small bowl, combine the Grounded Chia and Water; mix it and let it sit for 10-15 minutes.  While your waiting, grate your Carrots.  Pull out another large bowl and whisk the Vanilla, Grapeseed Oil, Coconut Milk, Agave, Sucant and Grounded Chia mixture.  Then, slowly begin to add the dry mixture to your large bowl. Stir well and fold in your Grated Carrots and Raisins.  Pour into prepared pans and bake for 30 to 35 minutes (can vary slightly depending on your oven).  The surface of your cake should be a dark golden brown and a toothpick should come out clean. 

{Vegan Coconut Cream Frosting}
*compliments of Elana’s Pantry

Ingredients:
~frosts 1 two layer cake or 24 cupcakes

1 cup Light Coconut Milk
1 cup Agave
pinch of Sea Salt
5 tsp Arrowroot Powder
1 TBSP Water
1 ¼ cup Coconut Oil

Pull out a saucepan and pour Coconut Milk, Agave and Sea Salt into it and let it simmer for 10 minutes.  Combine the Arrowroot and Water in a small bowl until it becomes a paste, then add to saucepan.  Whisk the ingredients vigorously until it’s shiny. It really does become shiny!  Turn off the stove and gradually blend in the coconut oil.  Let it cool for 10 minutes, then place it into a container for refrigeration.  Refrigerate the frosting for at least an hour and a half, until it turns white and solidifies. I refrigerated mine overnight.  When you are ready to frost your cake, pull it out and whisk until it’s fluffy.  Sample a bit… and frost your cake!


{Other Great Links}

Monday, November 29

Banana Chocolate Chip Bread


It's been a while since my last note to you all and for that I must apologize.  Life has taken me on a journey this year and these last few weeks have been no exception.  I wish I had a career in the culinary arts, but for now that dream is at bay.  Instead, I have two normal jobs which have lovely and difficult parts to them.  Hopefully after this week life will slow down a bit and I will be able to spend more time in my little neglected kitchen. 

Ironically, it's been raining cook/nutritional books of late and I am just antsy to break into them and put their recipes/nutritional theories to the test.  As you may have gathered from reading my notes, I am slightly obsessed with books, especially any that share nutritional/food information.  I love to learn new or even old ideas, just the thought of it gets me excited!  Today I am sharing with you the result of a delicious bread.  The recipe comes from one of my old favorites, NYC Babycakes, and surprisingly I actually followed it almost to a tee! I exchanged the rice milk with almond, but that's it.  It really was quite out of the ordinary for me!  
{Banana Chocolate Chip Bread}


Since I did create the bread straight from Erin's cookbook and I believe in supporting chefs that create the seemingly "impossible" recipes {in other words the delicious treats that are free of dairy, gluten, soy, eggs, etc.} I will not be posting the recipe for you here.  I want you to find her cookbook and find it yourself.  It's designed beautifully and the bakery is promoted by many of its celebrity fans.  Believe me the book is so worth the expense and there are many more wonderfully yummy recipes for you to try too. Erin, you make a perfectly fluffy, sweet and satisfying Banana Chocolate Chip Bread.  Thank you for your many labored hours in that little New York kitchen of yours! 
Related Posts with Thumbnails